Computer mouse is a plug-and-play device. No additional software is required to be installed to connect or install a mouse.
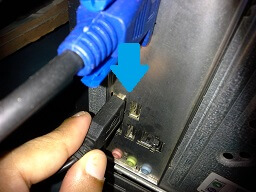
Step 1 – Connect Cables
Plug the mouse in the mouse port. For a PS/2 mouse, Connect the mouse to the PS/2 port on the back of the computer. You will notice two PS/2 ports at the back of the computer next to each other one for keyboard and other for mouse .
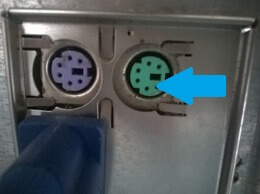
PS/2 Port
Look for a small symbol next to the port to identify which one is for the mouse. If your mouse is color coded then ensure you connect to the green color port. If you have a USB mouse then plug it into any of the USB port.
USB Port
Step 2 – Placement
Place the mouse on the right hand side of the keyboard. If you are left handed then keep the mouse on the left hand side of the keyboard.
Step 3 – Start Using
Once the mouse is plugged and connected in and you move the mouse or drag the mouse, the arrow on the screen (called as cursor) should move along with it. Any mouse will usually have a left button and a right button. Single click the left button to select any menu or any folder. Double click the left button to open any application, folder , document.